Homemade Reese’s Cups with Vanilla Filling
Highlighted under: Classic Collection
I always find myself craving something sweet, and these Homemade Reese’s Cups with Vanilla Filling hit the spot perfectly. There’s something incredibly satisfying about making candy from scratch. Not only do you get to customize the flavors, but the process is really fun! I love how the creamy vanilla filling contrasts with the rich chocolate, creating the ultimate indulgence. It's a treat that transports me back to childhood, and I just can't resist reaching for another.
When I first attempted making these homemade Reese’s Cups, I was surprised at how simple it was to create them from scratch. I used high-quality chocolate to ensure a rich, creamy taste, and it really made all the difference. The challenge was getting the vanilla filling just right, but after a few tries, I discovered that a hint of powdered sugar helped balance the flavors perfectly.
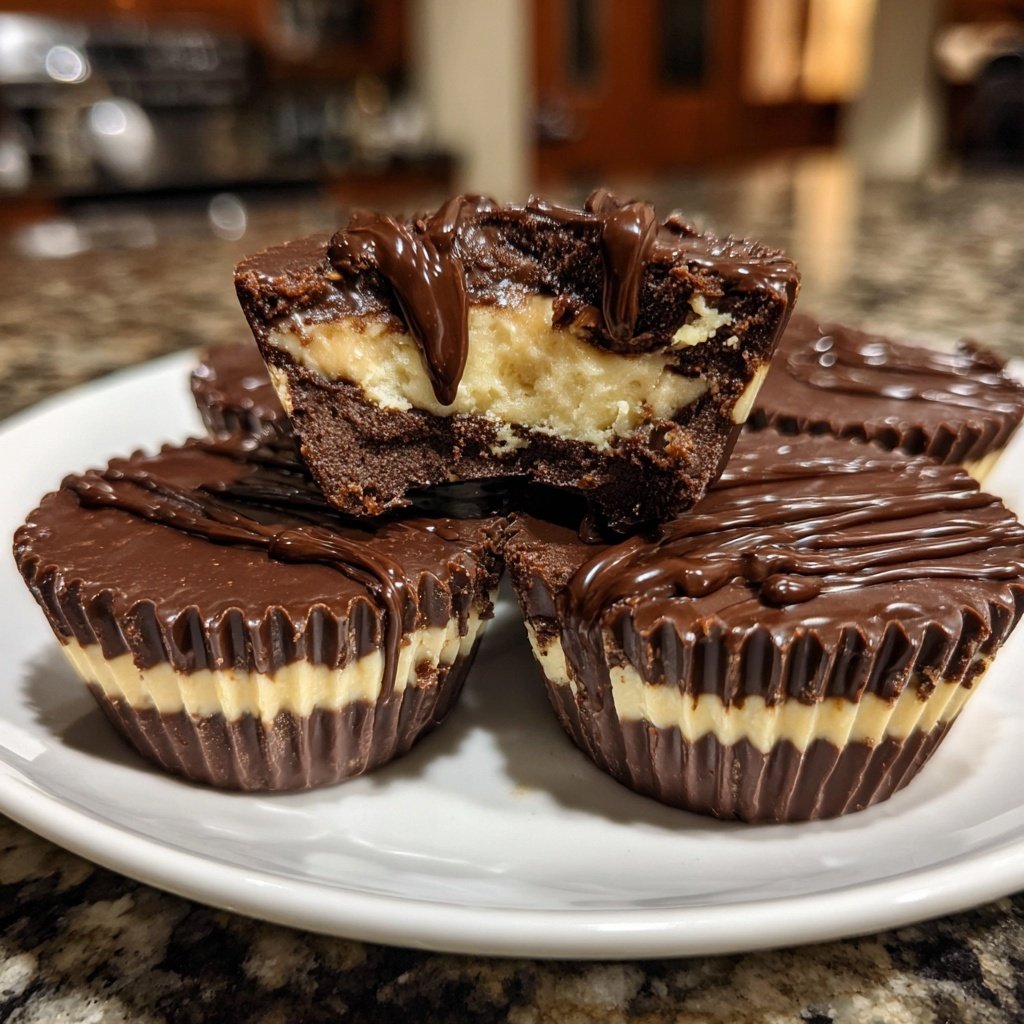
The joy of biting into the smooth chocolate exterior and tasting the sweet vanilla inside is hard to beat. My friends and family adore them, and they’ve quickly become a go-to treat for gatherings. Just be sure to let the chocolate set completely for the best texture!
Why You'll Love This Recipe
- Rich chocolate flavor paired with creamy vanilla filling
- Customizable to your taste with various fillings and chocolates
- Perfect for sharing at parties or enjoying on your own
Mastering the Chocolate Shell
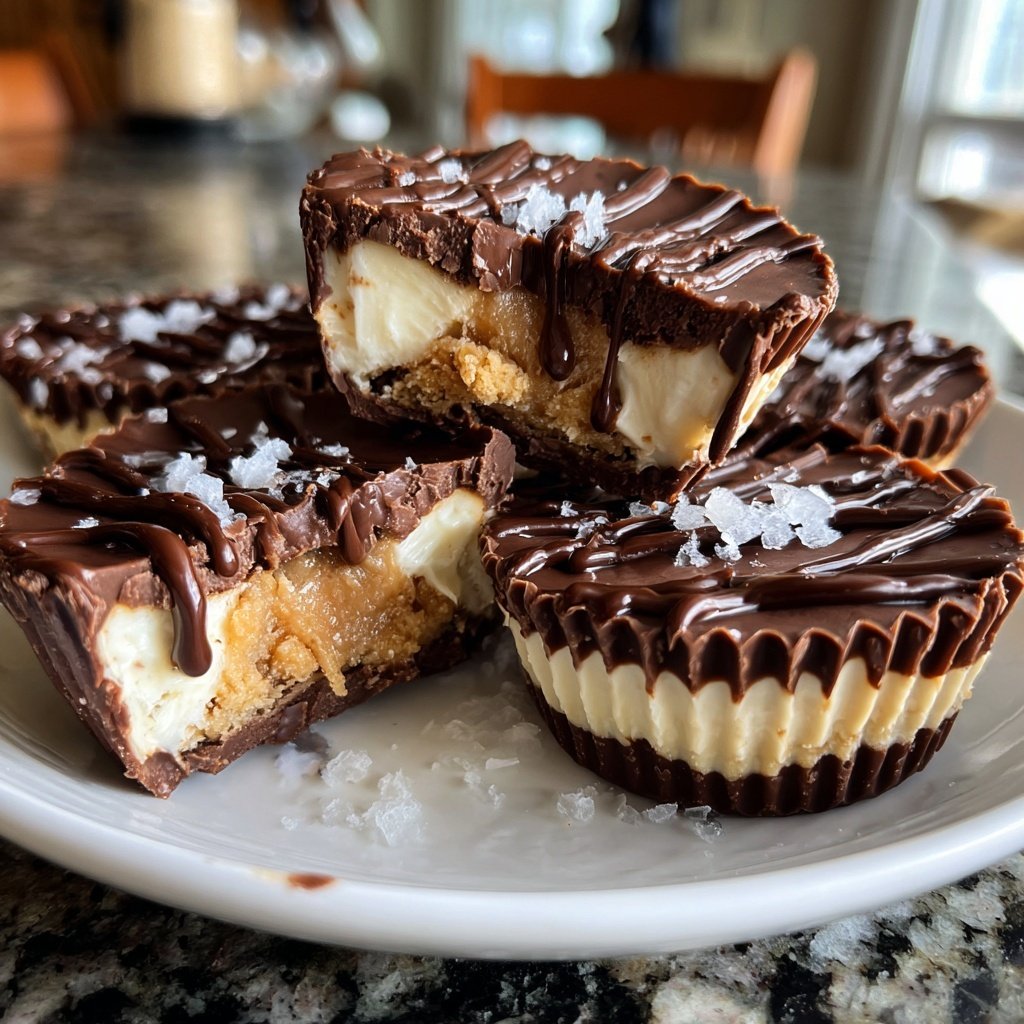
Creating the perfect chocolate shell is crucial for a satisfying texture and flavor in your Reese’s cups. Ensure your chocolate chips are of high quality, as they greatly influence the final taste. While semi-sweet chocolate is traditional, dark chocolate fans might enjoy using that for a richer bite. The addition of coconut oil helps to thin the chocolate, making it easier to spread and ensuring a nice, glossy finish. Watch closely while melting; overcooked chocolate can become gritty and lose its shine.
When pouring the melted chocolate into the liners, don't rush the process. Use a spoon or small silicone spatula to help guide the chocolate up the sides and create a uniform shell. Ideally, each liner should have enough chocolate to create a sturdy base, about 1/4 inch thick. A good visual cue is to look for a slight gloss on the chocolate as it sets. If the chocolate is too thick to spread, reheat it briefly to restore its pouring consistency.
Tips for the Vanilla Filling
The vanilla filling is where you can get creative! For a different flavor, try replacing the peanut butter with almond or cashew butter. However, be aware that the texture might vary slightly. If you're looking for a sweeter filling, adjust the powdered sugar to your preference. For a creamier texture, consider adding a splash of heavy cream or a bit more softened butter before mixing. This will not only enhance the creaminess but also help the filling hold up better when the cups are bitten into.
Mixing is vital: use an electric mixer at medium speed to achieve that smooth, creamy texture without any chunks. The goal is to create a filling that is easy to spoon into the shells but not too runny. If your filling seems too thick, a tiny bit of milk can help loosen it up without losing flavor. Make sure to taste your filling before sealing the cups; you might want to add a touch more vanilla extract for an extra flavor boost.
Ingredients
For the Chocolate Shell
- 2 cups semi-sweet chocolate chips
- 1 tsp coconut oil
For the Vanilla Filling
- 1 cup creamy peanut butter
- 1/2 cup powdered sugar
- 1 tsp vanilla extract
- 1/4 cup unsalted butter, softened
Make sure all your ingredients are at room temperature for the best results.
Instructions
Prepare the Chocolate
In a microwave-safe bowl, combine the chocolate chips and coconut oil. Heat in 30-second intervals, stirring in between, until smooth.
Set Up the Molds
Line a muffin tin with paper liners. Pour a small amount of melted chocolate into each liner and spread it up the sides to create a shell.
Make the Vanilla Filling
In a bowl, mix the peanut butter, powdered sugar, vanilla extract, and softened butter until smooth and creamy.
Fill the Cups
Once the chocolate shell is set, add a spoonful of the vanilla filling into each cup.
Seal the Cups
Top the filling with more melted chocolate, covering it completely. Tap the pan gently on the counter to remove any air bubbles.
Chill and Serve
Place the muffin tin in the refrigerator for at least 30 minutes, or until the chocolate is firm. Enjoy your homemade treats!
Store any leftovers in an airtight container in the refrigerator.
Pro Tips
- For a fun twist, you can try mixing in different flavor extracts to the filling, like almond or mint!
Storage Tips
These Homemade Reese’s Cups can be stored in an airtight container at room temperature for up to a week, but I recommend refrigerating them for optimal freshness. If you choose to refrigerate, they can last for two weeks. The cool environment helps maintain their shape and texture, especially the creamy filling. Just be sure to allow them to come to room temperature for a few minutes before enjoying, as the chocolate can become quite firm in the fridge.
For longer storage, consider freezing your cups. Place them in a single layer on a baking sheet until frozen solid, then transfer them to a freezer-safe container. They can be enjoyed straight from the freezer, offering a refreshing treat on hot days. Just remember to allow for a little extra time to soften before indulging.
Variations to Try
If you’re feeling adventurous, try adding ingredients into the vanilla filling. Chopped nuts, such as almonds or pecans, can add crunch and complement the creamy texture. Alternatively, you might want to swirl in some crushed cookies for added flavor and texture. For a fun twist, consider incorporating flavored extracts, like almond or orange, that can personalize your filling to match the season or your taste buds.
For presentation, consider drizzling melted chocolate over the filled cups before chilling. This adds an extra decorative touch and enhances the chocolate flavor. You can even sprinkle a pinch of sea salt on top before it sets for a salted chocolate version that contrasts beautifully with the sweetness of the filling.
Questions About Recipes
→ Can I use milk chocolate instead?
Yes, milk chocolate can be used for a sweeter taste; however, it may melt differently.
→ How should I store these homemade cups?
Store them in an airtight container in the fridge to keep them fresh.
→ Can I make these vegan?
Absolutely! Use dairy-free chocolate and a plant-based butter substitute.
→ Why is my filling too runny?
If your filling is too runny, try adding more powdered sugar to thicken it.
Homemade Reese’s Cups with Vanilla Filling
Created by: Loretta Winslow
Recipe Type: Classic Collection
Skill Level: Intermediate
Final Quantity: 12 cups
What You'll Need
For the Chocolate Shell
- 2 cups semi-sweet chocolate chips
- 1 tsp coconut oil
For the Vanilla Filling
- 1 cup creamy peanut butter
- 1/2 cup powdered sugar
- 1 tsp vanilla extract
- 1/4 cup unsalted butter, softened
How-To Steps
In a microwave-safe bowl, combine the chocolate chips and coconut oil. Heat in 30-second intervals, stirring in between, until smooth.
Line a muffin tin with paper liners. Pour a small amount of melted chocolate into each liner and spread it up the sides to create a shell.
In a bowl, mix the peanut butter, powdered sugar, vanilla extract, and softened butter until smooth and creamy.
Once the chocolate shell is set, add a spoonful of the vanilla filling into each cup.
Top the filling with more melted chocolate, covering it completely. Tap the pan gently on the counter to remove any air bubbles.
Place the muffin tin in the refrigerator for at least 30 minutes, or until the chocolate is firm. Enjoy your homemade treats!
Extra Tips
- For a fun twist, you can try mixing in different flavor extracts to the filling, like almond or mint!
Nutritional Breakdown (Per Serving)
- Calories: 380 kcal
- Total Fat: 26g
- Saturated Fat: 15g
- Cholesterol: 195mg
- Sodium: 85mg
- Total Carbohydrates: 32g
- Dietary Fiber: 3g
- Sugars: 24g
- Protein: 6g